Beginner's Guide to Creating a Discord Bot
This tutorial will guide you through creating your first Discord bot. We assume you have Python installed and are using an IDE like PyCharm. If not, ensure you have Python installed from the official Python site.
Step 1: Set Up a Discord App
- Go to the Discord Developer Portal.
- Log in with your Discord account or create one if you don't have one.
- Click on the New Application button in the top-right corner.
- Give your application a name (e.g., "My First Bot") and click Create.
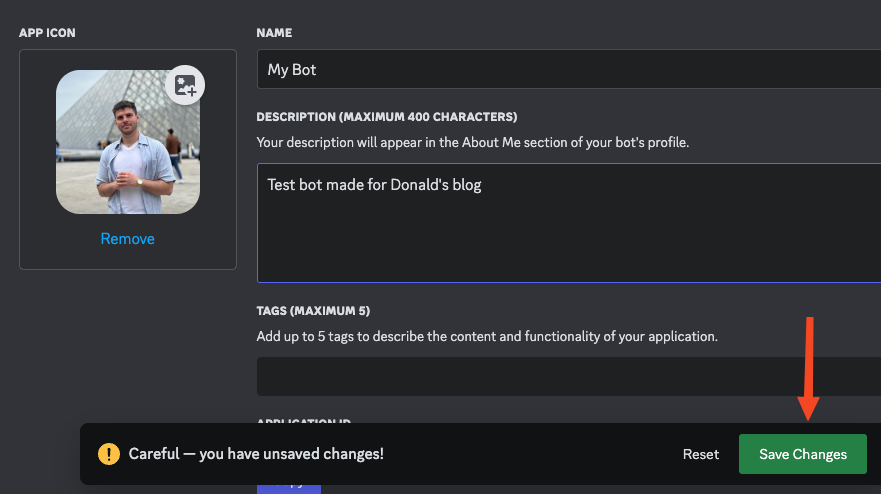
- Navigate to the "General Information" tab in the left-hand menu. Update the information as needed (e.g., application description, icon, etc.), then click "Save Changes". Below is an image for reference:
- Next, navigate to the "Bot" tab in the left-hand menu. Then scroll down to turn on "MESSAGE CONTENT INTENT" as this what allows your bot to access messages sent in a server. Don't forget to hit save.

Step 2: Invite the Bot to Your Server
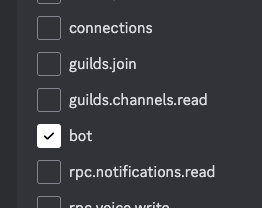
- Next, navigate to the "OAuth2" tab in the left-hand menu and enter the section "URL Generator". Let's invite the bot to your discord server with a set of permissions by selecting "bot" in the "Scope" section.
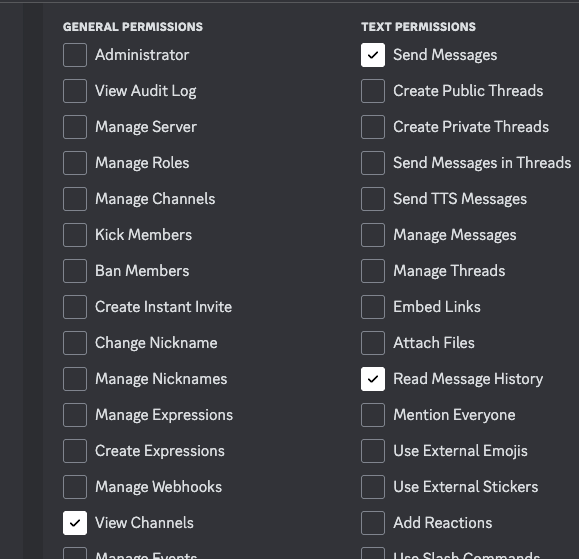
- For now, we are only interested in 3 permissions, which are "Send Messages", "View Channels" and "Read Message History".
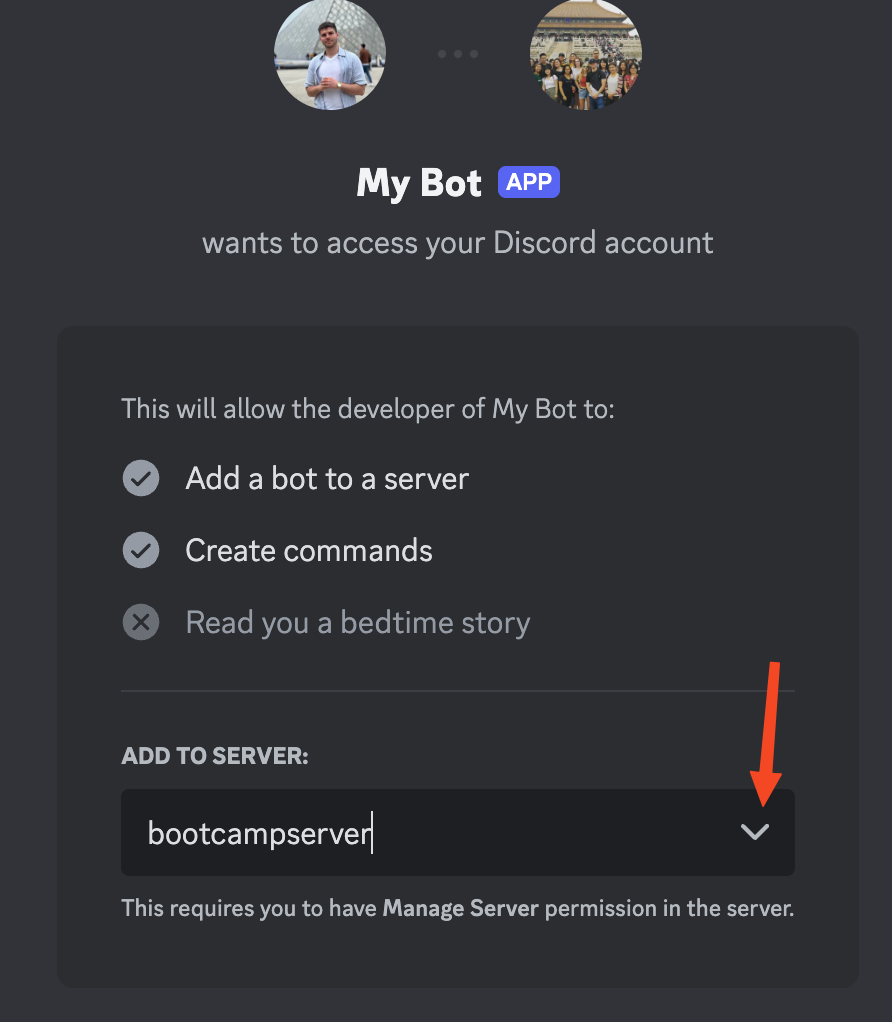
- Scroll down to the Generated URL. Copy it and paste it into a new tab on your browser, this will invite the discord bot to the server that you choose.
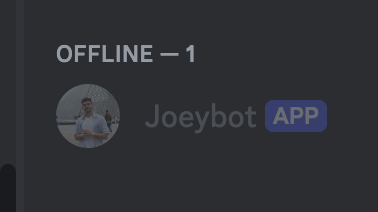
- Authorize the bot and complete the CAPTCHA. When that is done, you should see your bot listed as offline in your server.
Step 3: Setting Up the Project
Create a New Python Project
Open PyCharm or whatever Python IDE you use and create a new Python project. Install the required library discord.py by going to your terminal and running:
pip install discord

You will also need to install the dotenv library if you don't already have it. This allows you to load into your Python program any private things like passwords and tokens saved in a .env file.
pip install python-dotenv
Create a .env File
In your project directory, create a new file called .env to store your bot token securely:

Go back to your Discord Developer Portal and inside your app, go back into the "Bot" tab where you will generate a token to uniquely identify your bot. You do this by pressing the "Reset Token" button.
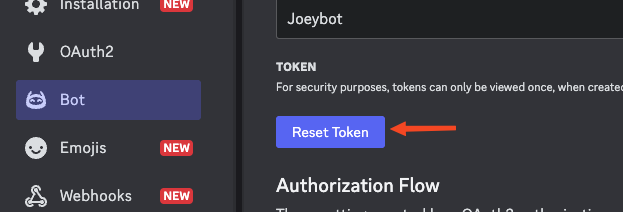
Then copy and paste this token into your .env file using the syntax:
TOKEN=your_discord_bot_token

Create the Python Script
Create a file named bot.py in your project directory. Add the following code to check if all libraries were installed and the token loads correctly.
import discord
import dotenv
import os

dotenv.load_dotenv()
my_bot_token = os.getenv('TOKEN')
print(my_bot_token)
Running this code should successfully print out your Discord token in the terminal. If you get an error, search online or use ChatGPT to resolve it. The next step is to create an instance of the Discord bot with a new set of intents.
intents = discord.Intents.default()
intents.message_content = True
bot = discord.Client(intents=intents)
Now define your first bot event, on_ready. This tells the program what to do when the bot turns on. Let's just print the bot's name in the terminal.
@bot.event
async def on_ready():
    print(f'{bot.user} is ready')
We still haven't called function to run the bot, so it won't turn on just yet. To get the bot to turn on, we must add the following line of code to the end of our file.
bot.run(my_bot_token)
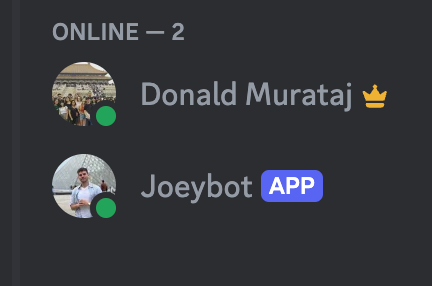
Now try running the code. Check the messages in the terminal that will tell you when your bot is ready. After that, if you go to your discord server, you will see that the bot is online.
In its current state all the bot can do is turn on, let's get it to at least respond to messages. Let's add another discord event for on_message. This will have to come before bot.run(my_bot_token).
@bot.event
async def on_message(message):
    if message.author == bot.user:
        return

    await message.channel.send('Hello')
Now your overall code should look as follows.
import discord
import dotenv
import os

dotenv.load_dotenv()
my_bot_token = os.getenv('TOKEN')

intents = discord.Intents.default()
intents.message_content = True
bot = discord.Client(intents=intents)

@bot.event
async def on_ready():
    print(f'{bot.user} is ready')

@bot.event
async def on_message(message):
    if message.author == bot.user:
        return

    await message.channel.send('Hello')

bot.run(my_bot_token)
Run the Bot
Now when you type anything into the Discord chat, the bot will respond with "Hello".

Next Steps
Now that your bot is online and can respond to messages, you can start adding more functionality! Check out the discord.py documentation for more advanced features.
Please reach out using the contact button at the top if you have any questions!